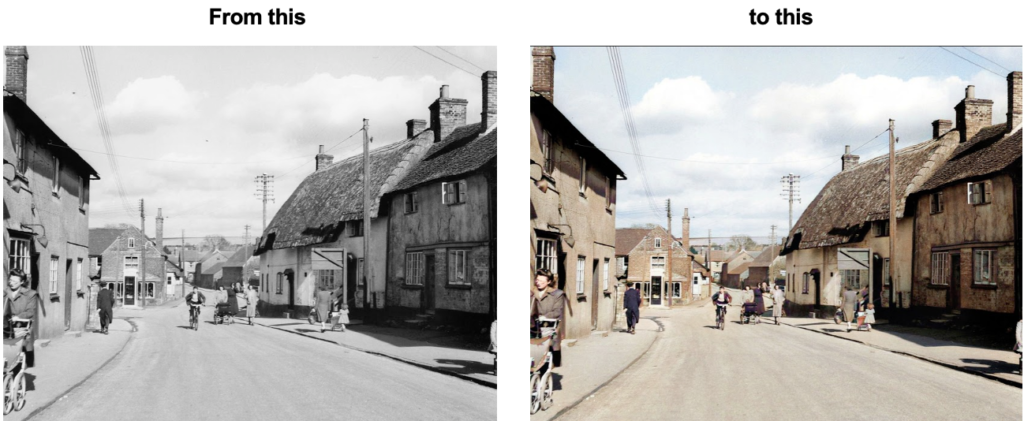
A gallery of historic black and white photographs brought to life by colouring by Jim Bradshaw.
First, Jim explains how he colours a photograph:
I use Photoshop first on the monochrome image to make the most of what’s available in the photo before doing the colour conversion. Then I use DeOldify via MyHeritage to do the basic conversion. I then save and open the results again in Photoshop where I create layers for each artifact that needs adjusting. These layers must be set to colour. Using the paint brush, it’s then simple (with a steady hand) to overpaint any errors and then adjust the opacity and strength to match the original. To adjust any specific colours, I also use the correction filters, which allows me to change the hue, saturation and opacity of each colour. Any scratches or damage can be corrected using a combination of the clone stamp and artifact removal tools. Finally, I flatten all layers to create the final photo. I’ve got the hang of the process now and I can convert most pictures in less than an hour each. When I first started, it could take a few days, just to do one photo, but that included researching the correct colours for the period.
Images of Lambourn – Colorised by Jim Bradshaw:


Lambourn Railway – Colorised by Jim Bradshaw: